SETAR DNS Configuration 2022
SETAR NV. would like to inform you that as of April 1st, 2022, we will be modifying our DNS servers. DNS stands for 'Domain Name System' and is responsible for letting the web browsers interact through the Internet Protocol (IP) addresses. DNS translates domain names to IP addresses so browsers can load Internet resources. To ensure that your devices stay connected to the Internet and don't encounter connectivity problems, we would like to provide you with simple steps to help you configure the new IP addresses on your device.
Important notification!!!
The DNS configuration is only necessary for customers who manually changed their DNS in their device. For all other customers, this will change automatically.
You can contact SETAR at #127 or email at customercare@setar.aw if you're having trouble with the configuration.
MacOS (MacOS 10.15 Catalina, MacOS 11 Big Sur, and MacOS 12 Monterey)
MacOS (MacOS 10.15 Catalina, MacOS 11 Big Sur, and MacOS 12 Monterey)
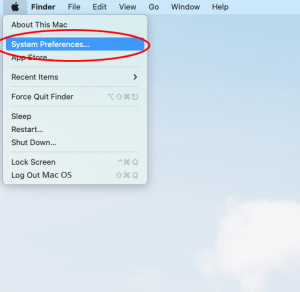
1. Click on your Apple Logo (top left corner)
2. Go to your System Preferences
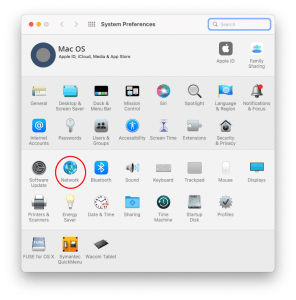
3. Select your Network tab
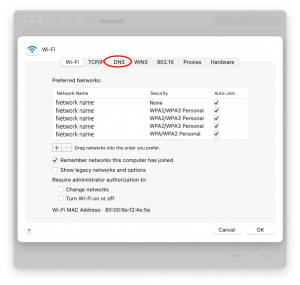
4. Click on the network you are using if you’re connected on Wi-Fi then select Wi-Fi
5. In the bottom right corner select Advanced
6. Go to the DNS tab. Here you will see your current DNS servers and search domains
a. Your search domain remains the same: setarnet.aw
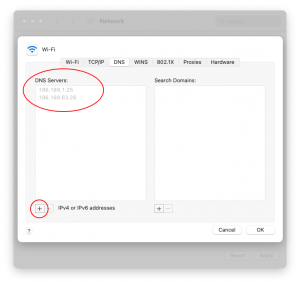
7. Reconfigure your DNS servers by selecting the plus sign (+) on the bottom left and enter the following IPs:
a. 186.189.1.25
b. 186.189.63.26
8. Click on Ok
9. Click Apply in the Network tab to finalize change
Additional Note for MacOS
• In case your device is connected to your local host through Ethernet, your DNS configuration is automatically set.

iOS (iOS 15)
iOS (iOS 15)
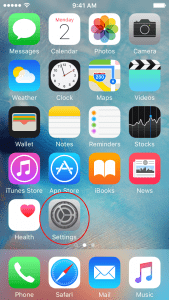
1. Go to your Settings
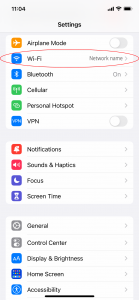
2. Select your WiFi
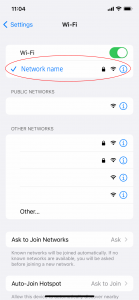
3. Tap the i icon of the network you want to configure its DNS servers for
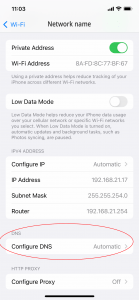
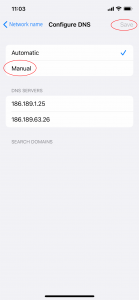
4. Go to the DNS section and tap on Configure DNS
5. In the case that your DNS servers do not match the following:
a. 186.189.1.25
b. 186.189.63.26
6. Change your configuration to Manual and remove your existing DNS Servers
7. Once you have removed your existing DNS servers, add the following IPs:
a. 186.189.1.25
b. 186.189.63.26
8. One you’re done, click on Save
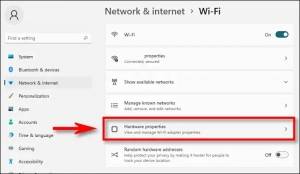
Windows 8, Windows 10, and Windows 11
Windows 8, Windows 10, and Windows 11
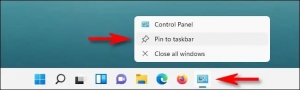
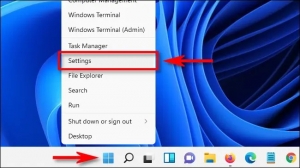
1. Go to your Control Panel
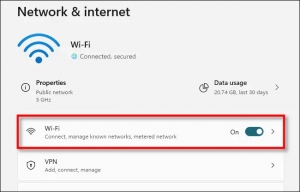
2. Open Network and Internet
3. Click on Network and Sharing Center
4. On the left panel click on Change adapter setting
5. Go to your internet connection (Wi-Fi, Ethernet, or other)
a. Double-click on your connection then select Properties
OR
b. Right-click on your connection and select Properties
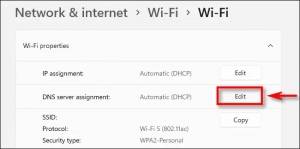
6. Then click on Internet Protocol Version 4 (TCP/IPv4)
7. Select Properties
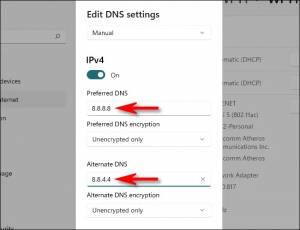
8. Go to the DNS section on the bottom half of the window:
a. Select Obtain DNS server address automatically, which should match:
i. 186.189.1.25
ii. 186.189.63.26
OR
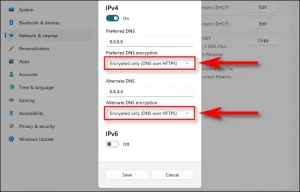
b. Select Use the following DNS server addresses to manually enter your new IPs:
i. 186.189.1.25
ii. 186.189.63.26
9. Click on Ok to save your configuration

Android OS (Android 9 or newer)
Android OS (Android 9 or newer)
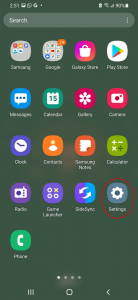
1. Go to your device Setting
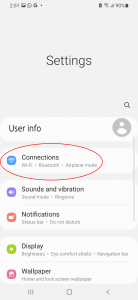
2. Go to your Connections
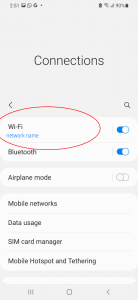
3. Go in the Wi-Fi tab
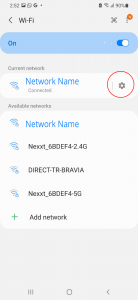
4. Select the Wi-Fi of which you want to configure the DNS
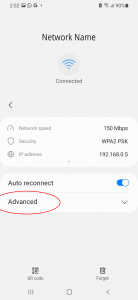
5. Click on the settings icon
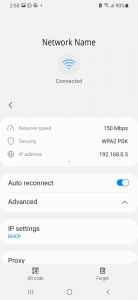
6. Tap on View more
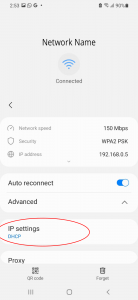
7. In the section of IP Settings change it from DHCP to Static
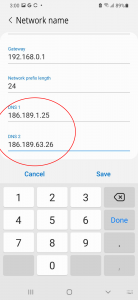
8. In the DNS lines fill in the following IPs:
a. DNS 1: 186.189.1.25
b. DNS 2: 186.189.63.26
9. Click on Save to save your new configuration